A Flexible View Control for XPages Part 5 – Processing Selected Rows
Posted: January 13, 2020 Filed under: Bootstrap, Custom Control, DataTables, Domino, JavaScript, jQuery, XPages | Tags: Bootstrap, DataTables, Domino View, jQuery, XPages Leave a commentThe previous post in this series demonstrated how to add click events to a view created with the Flexible View Control utilizing the callbacks that are built into DataTables. But once a row (or rows) is selected, how do you actually DO something with the selection?
Getting a Handle On Selected Rows
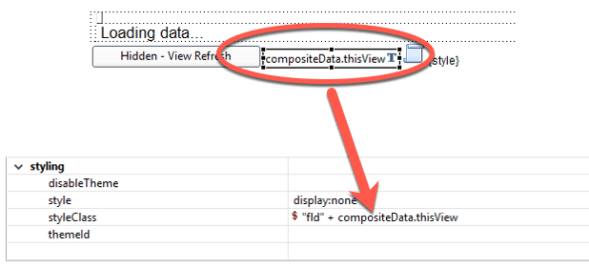
There is a hidden field on the control that stores the @unid of the selected rows along with any other data the View Definition configured to return when selected (in JSON format). When the control is rendered, a class is applied to the field based on the “thisView” parameter given to the control.
Client-Side Data
In the demo we built in Part 4, we gave our thisView parameter the value “viewBasic”. This allows us to reference the selected row(s) client-side in jQuery with the syntax:
$('.fldviewBasic').val();
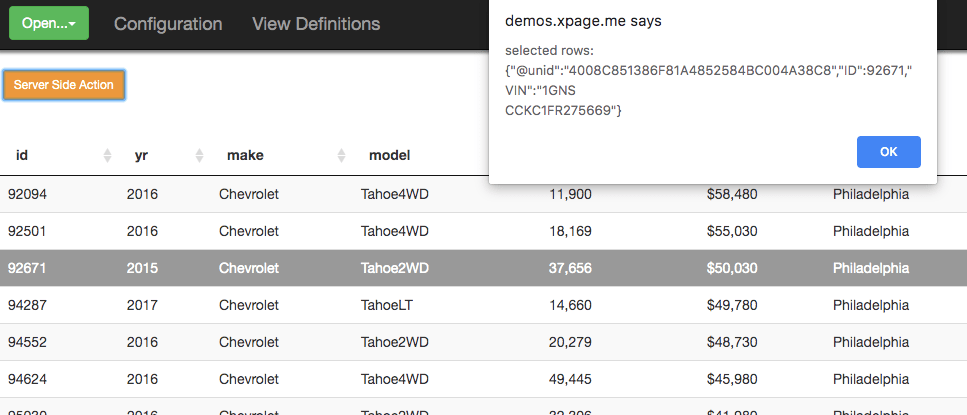
Using the demo from http://demos.xpage.me/demos/datatables-xpages-bootstrap.nsf/viewBasicCallbacks.xsp, when I select a row and examine the hidden field in dev tools I see:

What if I select multiple rows?

What if I want to return data besides just the row’s document id? To do so, I update the View Definition to tell it to return the columns I want when I click a row:
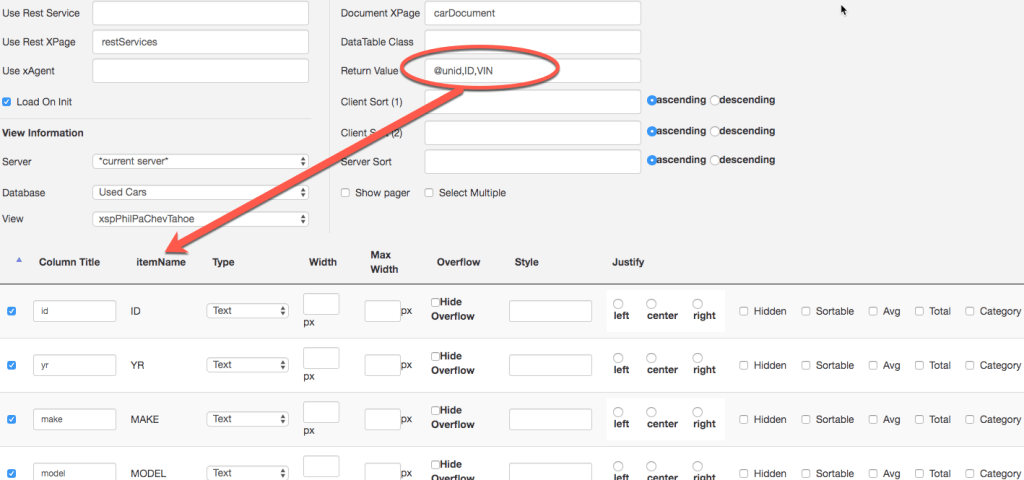
In this example, I want to return the ID and VIN columns in addition to @unid.

Important Note: By default, the @unid value is returned when a row is clicked. The Return Value of the View Definition overrides this value. Therefore, if values are entered in this field on the View Definition, @unid needs to be included if that value needs to be accessed.
Server-Side Data
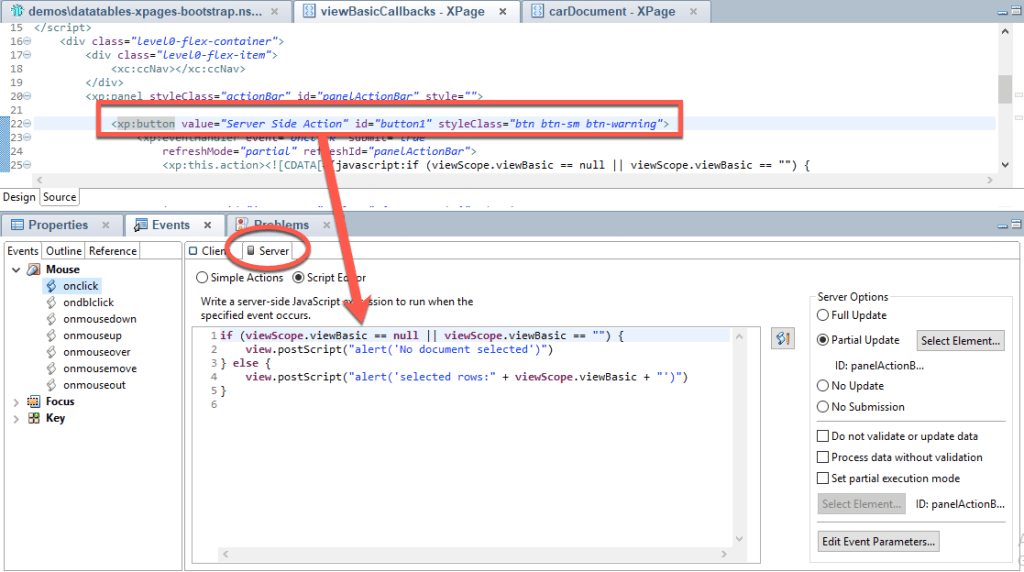
The Flexible View Control also makes it easy to pass the selected rows server-side. The aforementioned hidden field is bound to a viewScope mapped to the thisView value.

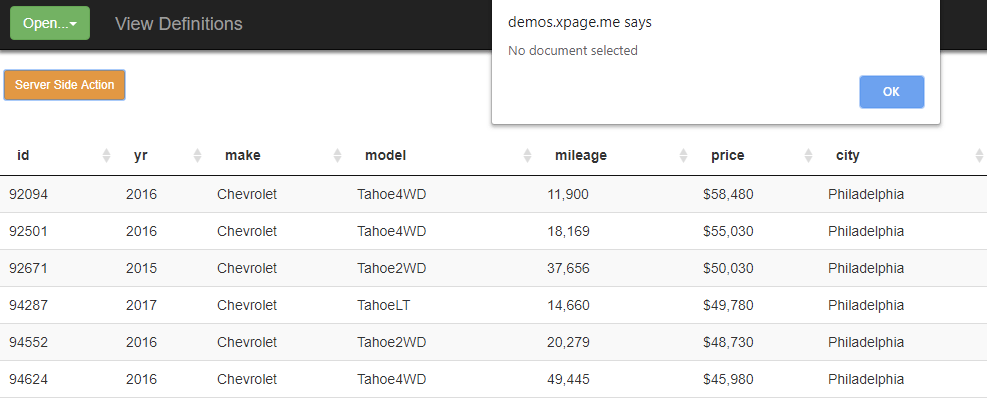
To demonstrate, I’m adding a button to my example above that does a partial refresh on a panel and executes some server-side code to examine the selected rows:
Recap
The Flexible View Control for XPages makes it very easy to get a handle on the rows selected in a view and process that data both client-side and server-side
In the next post …
I’ll start to demonstrate the “flexible” part of the Flexible View Control by showing how a Domino view with over 2 million records can be mined to create different representations of data with the control through the power of the View Definitions.
A Flexible View Control for XPages Part 3 – Create a Basic View
Posted: December 19, 2019 Filed under: Bootstrap, Custom Control, DataTables, Domino, XPages | Tags: Bootstrap, DataTables, Domino, XPages 3 CommentsSee the demo live
You can see the demo created in this post here. As more demos are added to demonstrate the many features of the Flexible View Control, they too will be available online.
In Parts 1 & 2 we learned about the Fexible View Control and created the configuration we needed to get started with our application.
The Data
Now, we are going to create a view from scratch utilizing a database of 2 million records comprised of used car data.
To get started I need to add the used car database to my configuration document so the View Definition XPage can read the views in this database.

As mentioned in a previous post, and as you can see above, I’m using Bootstrap (3.4) in my application for my UI framework. I’ve already created a navigator custom control:
![]()
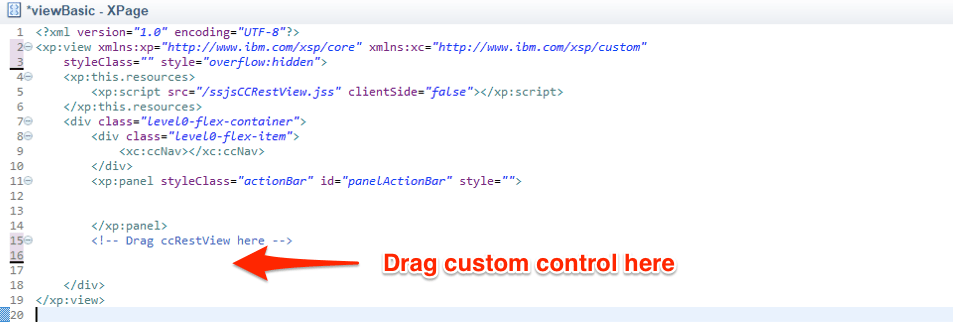
and an XPage template I’m going to use to create all of my demo pages:
<?xml version="1.0" encoding="UTF-8"?>
<xp:view xmlns:xp="http://www.ibm.com/xsp/core"
	xmlns:xc="http://www.ibm.com/xsp/custom" styleClass=""
	style="overflow:hidden">
	<xp:this.resources>
		<xp:script src="/ssjsCCRestView.jss" clientSide="false"></xp:script>
	</xp:this.resources>
	<div class="level0-flex-container">
		<div class="level0-flex-item">
			<xc:ccNav></xc:ccNav>
		</div>
		<xp:panel styleClass="actionBar" id="panelActionBar" style="">


		</xp:panel>
<!-- Drag ccRestView here


 -->

	</div>
</xp:view>
We’re going to get started with the most basic implementation of the Flexible View Control. In my used car database, I have a view xspPhilPaChevTahoe which shows all of the Chevy Tahoes in Philadelphia, PA. Normally I wouldn’t create a single purpose view like this – it’s being done for demonstration purposes only. In a database of 2M records, this view contains 70 and I’m going to display it with the Flexible View Control.

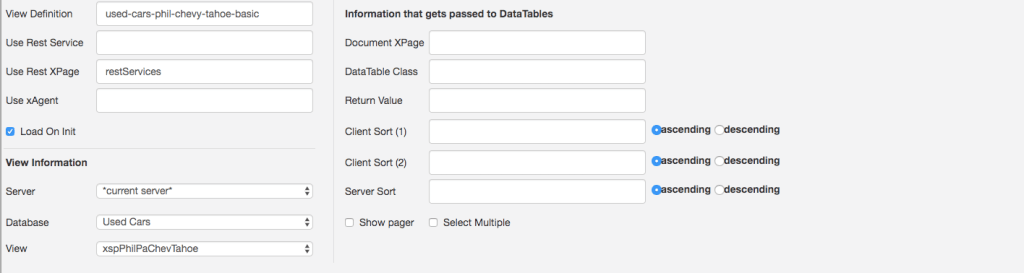
The View Definition
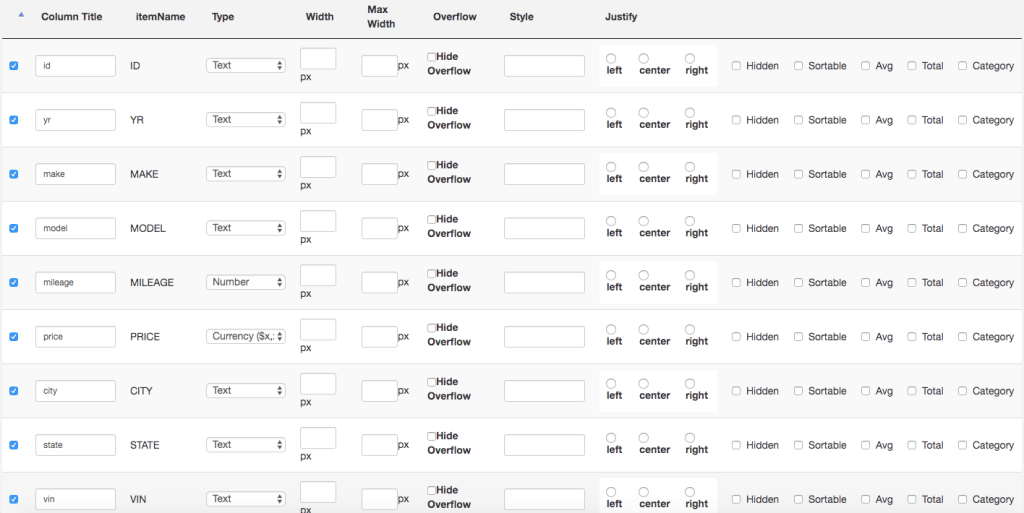
First, I create a View Definition and point it to the xspPhilPaChevTahoe view in the used car database and select all of the columns.
The REST Service
Next, I create the Rest Service that will be used to fetch the data. We told the View Definition to find the REST service on the restServices XPage. This is where I add mine and give it a path-info that matches the key I used in my View Definition above.

After building the application I do a quick test to make sure I’m getting data from the Rest Service:

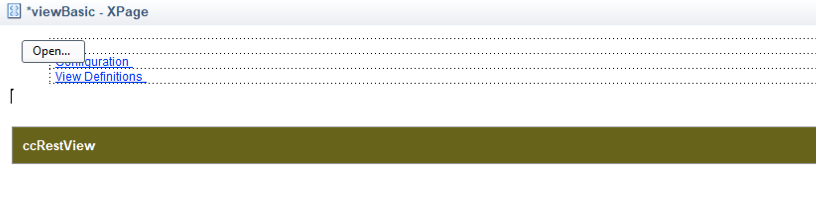
The XPage
To create my page where I want to put my view, I create a copy of the XPage template and call it viewBasic. I also add a link to the Open button in my navigator custom control that will open this new XPage.
The Flexible View Control
Now, I’m ready to add the control to my new XPage by dragging it from the custom control palette:
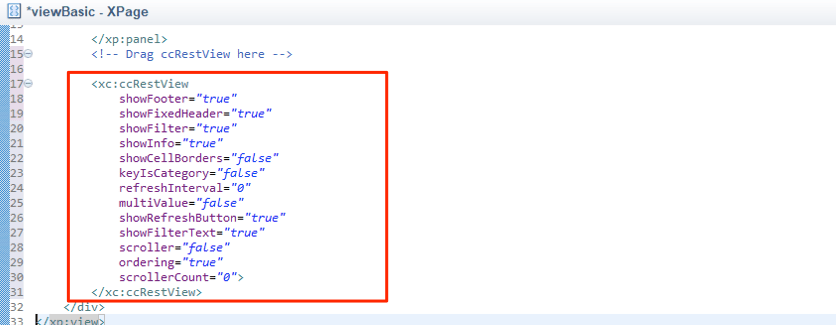
After adding the custom control, take a look at the custom properties by clicking on the control and then clicking the Custom Properties on the Properties tab. There are a lot of properties (some of which have default values) which are integral to making this the “Flexible” View Control for XPages. Some of these properties get passed on to DataTables as the view is constructed.
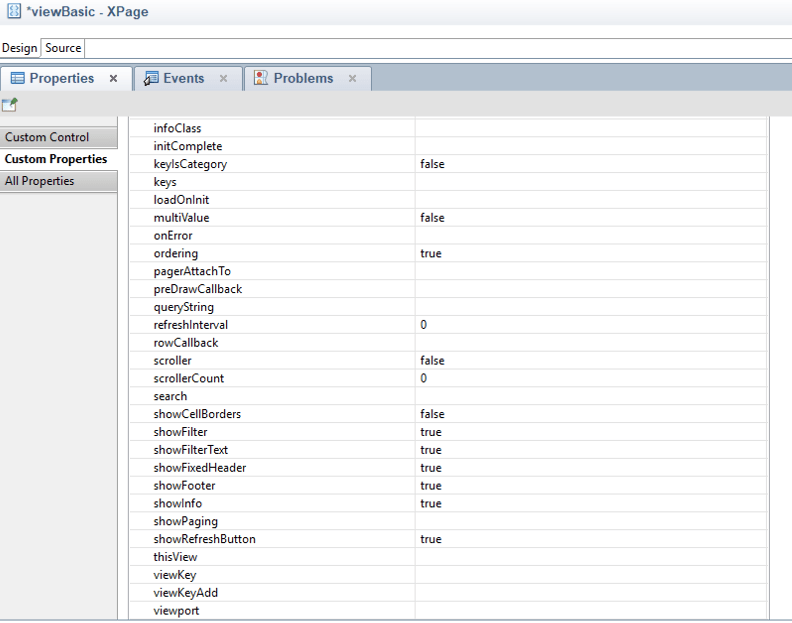
Most importantly, there are three properties that must be set in order for the control to work properly.
| Property | Description |
| thisView | Unique identifier for this view. This value is used in the internals of the custom control to get a handle on this instance of the view control. |
| viewKey | This value refers to the View Definition that the control will use to get its configuration and location of rest data. |
| dataTableClass | A CSS class name that gets applied to the DataTable and is used to refer to the table programmatically. This value should be unique. |
On my viewBasic XPage I use the following values:


The Results
After saving and building I load my viewBasic XPage in the browser and verify I am getting the results I expect:
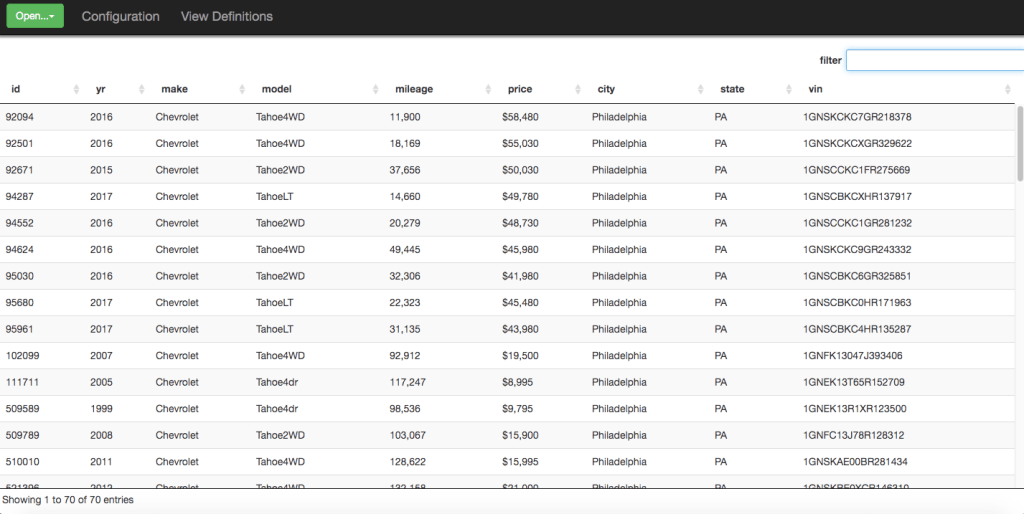
What we have now in our browser is a DataTable (v. 1.10.19) and all of the standard front end tools that come baked into that framework, such as filtering, sorting, etc.
Recap
The purpose of this post was to demonstrate how easy it is to quickly add a view to your application using the Flexible View Control for XPages:
- Create a View Definition.
- Create a REST Service (or reuse an existing service) that points to your Domino view.
- Add the custom control to your XPage and point it to your View Definition
Next
In the next post, I’m going to take this simple example and start adding advanced functionality to create more functional views.
