HCL Notes 12 / Windows 11 Preview ARM64 / Parallels on M1 Macbook Pro 16″
Posted: October 27, 2021 Filed under: Domino, HCL | Tags: HCL, Notes12, Parallels Leave a commentWith the recent arrival of the powerful new Macbook Pros armed with the Apple M1 chip, the elephant in the room for many Domino developers was how will the ability to virtualize Windows in order to run Notes and Designer be affected. Like many others, I have run Parallels since its release in 2005 to support the virtualization abilities of the Intel Macbook Pros released at that time.
The initial virtualization prospects on the M1 machines looked daunting .. you need an ARM64 version of Windows and links to official Microsoft downloads that were being linked to by Parallels were not working. Uh oh. Maybe not the best road to go down if you rely on virtualization as a production setup.
However, with my 2017 Macbook Air starting to show its age, I decided to take a hard look at the new Macbook Pros. Since it is not my primary work machine and I use the Mac side of things to do a bunch of personal stuff, rolling the dice seemed like a worthwhile thing to do, so I waltzed into my local Apple store and ended up walking out with a 16″ Macbook Pro with an M1 Pro processor. With a little trial and error, it ended up being pretty easy to get the ARM64 version of Windows 11 Preview installed.
DO THIS
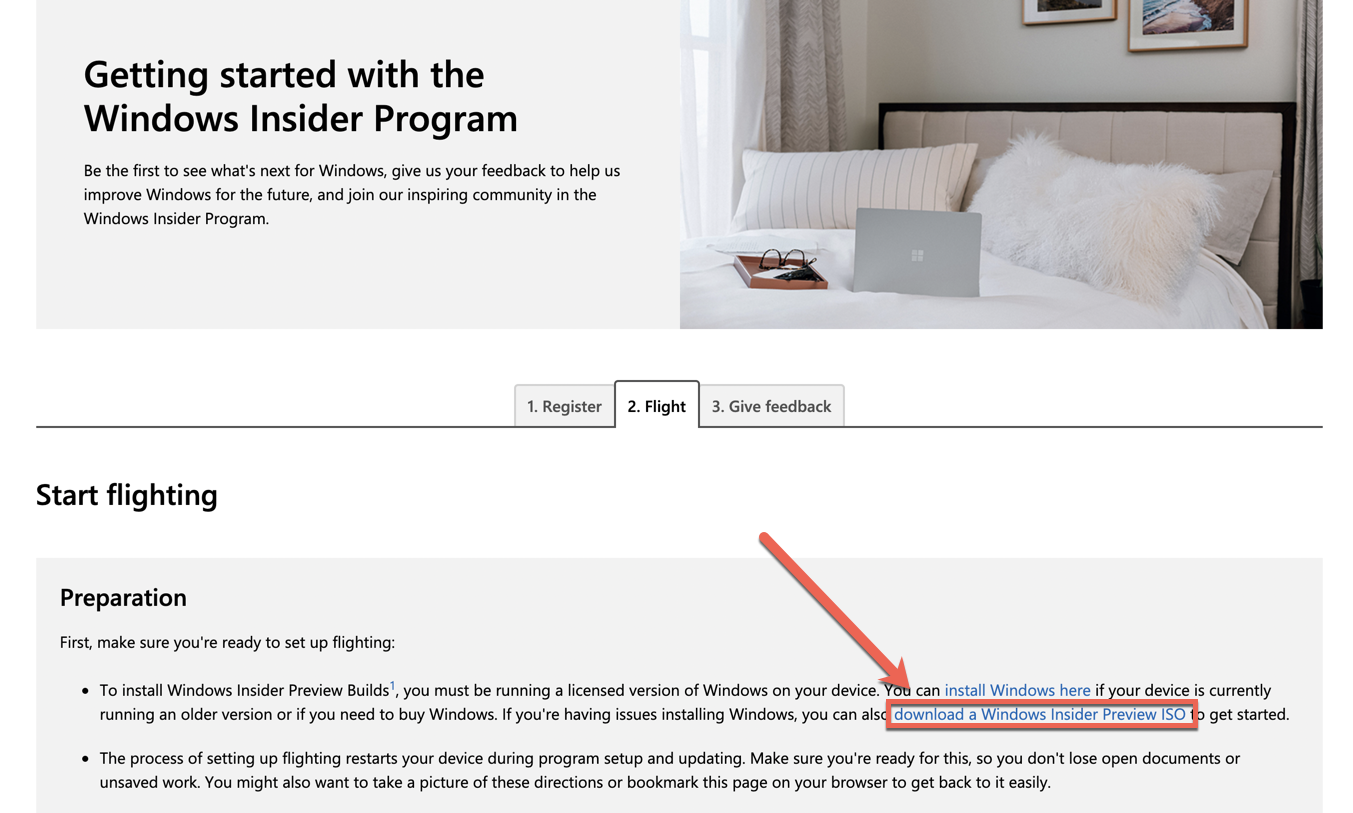
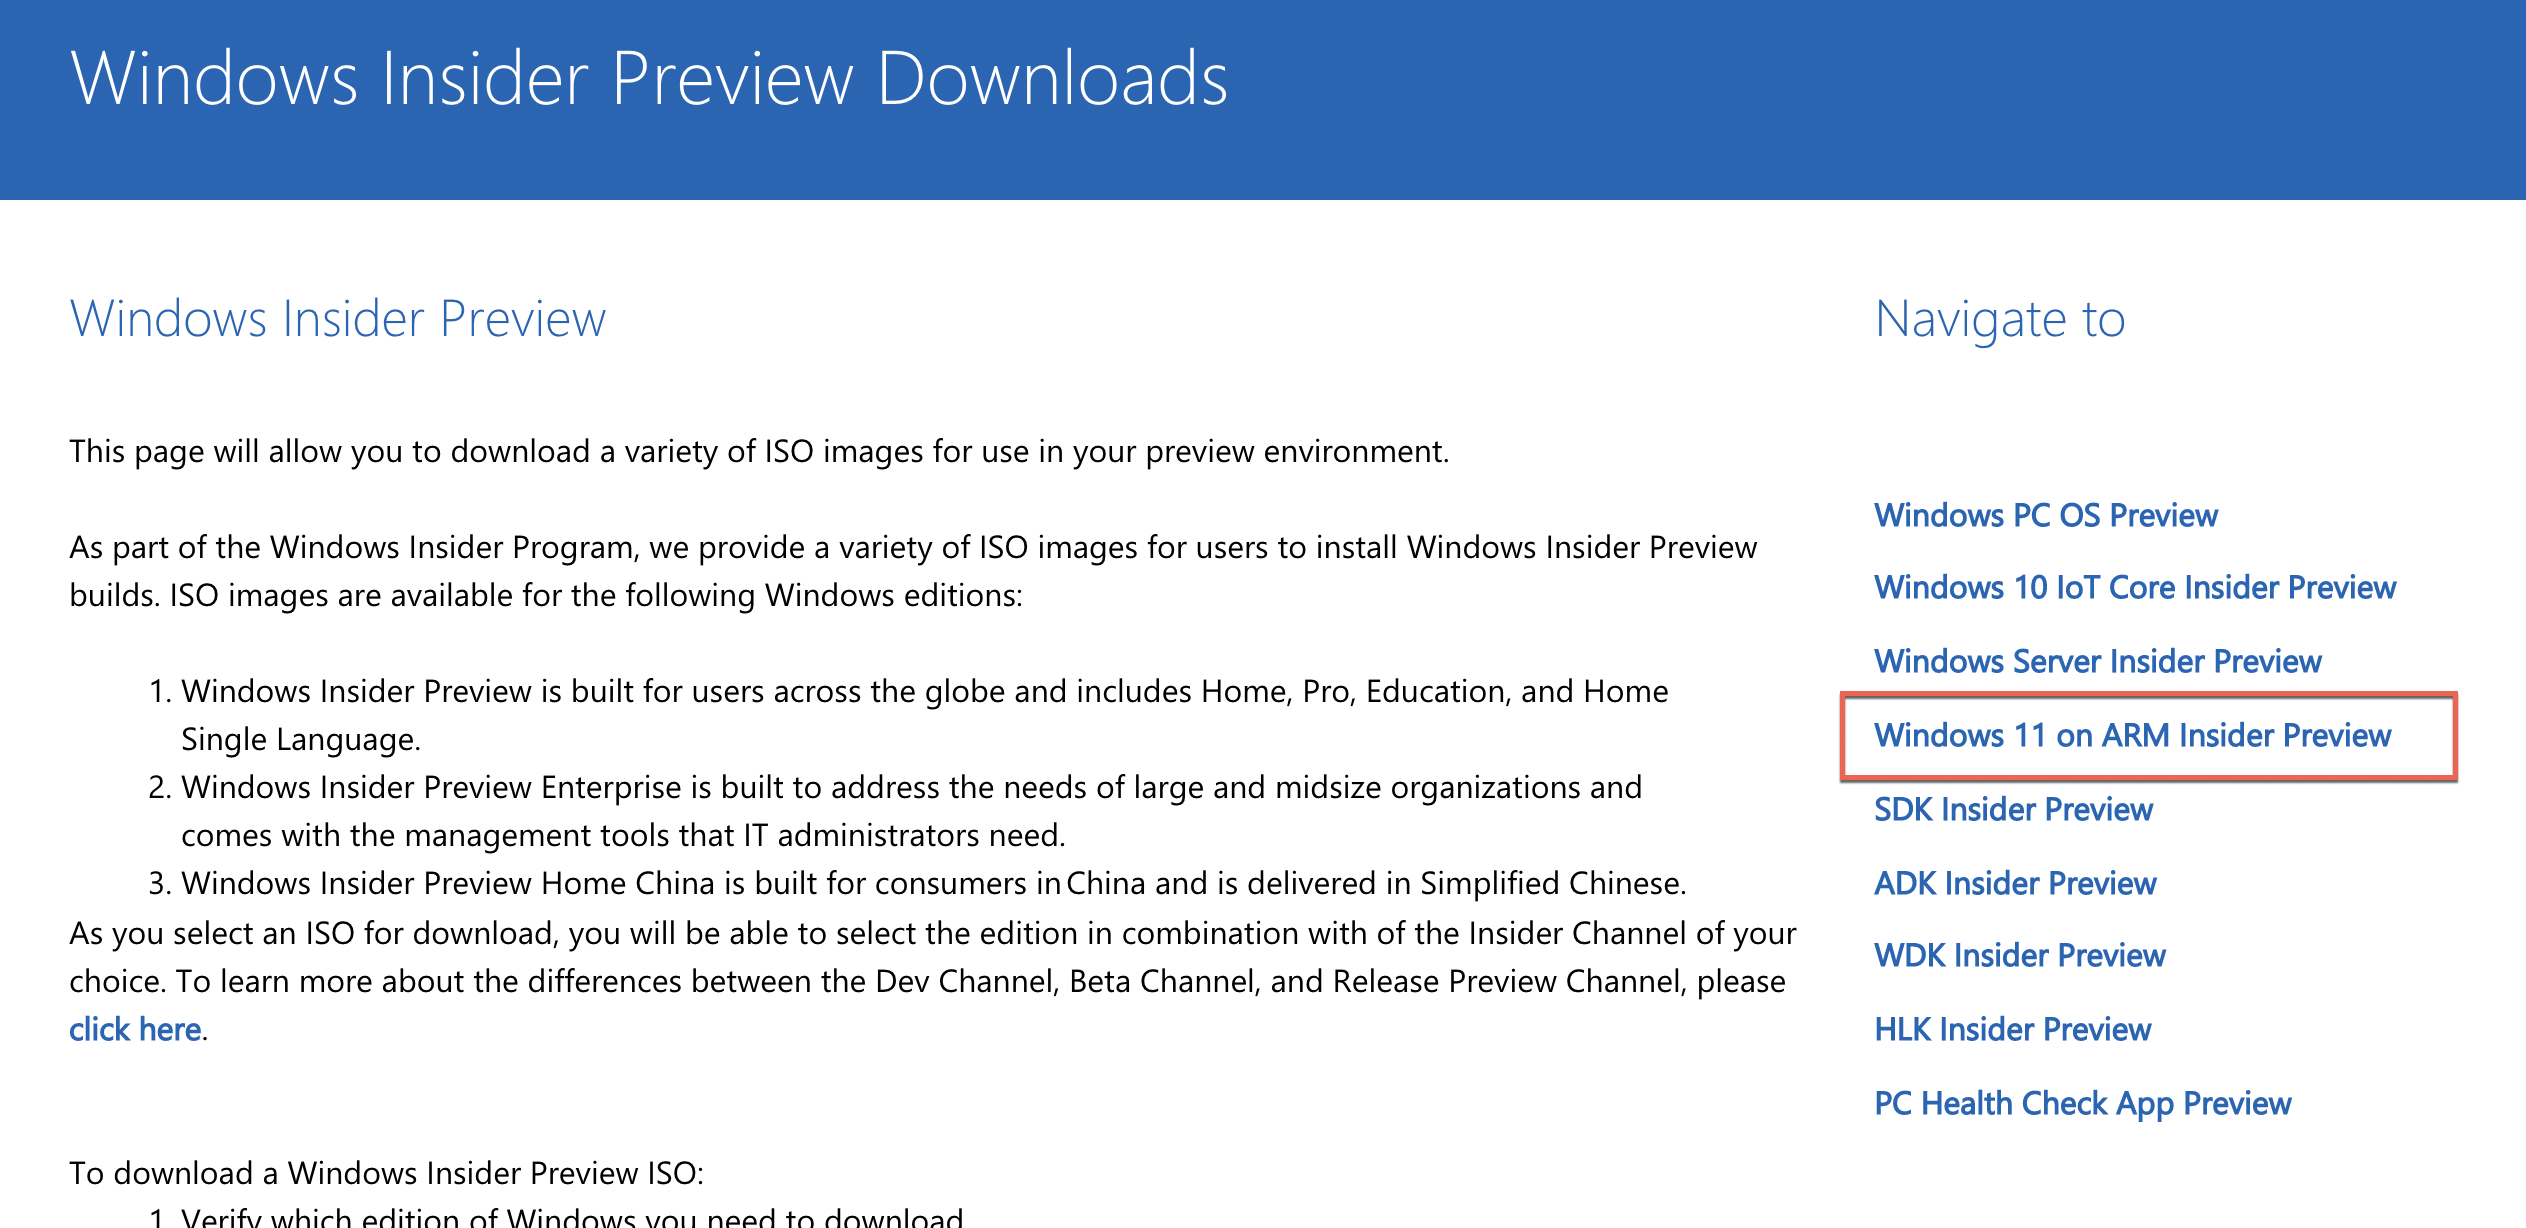
- If you haven’t already, register for the Windows Insider program.
- Download the Windows 11 Preview ARM64 .vhdx file. The screenshots below show how to find it on the Windows Insider site.
- In Parallels create a new VM and point it to the downloaded file.
- Sit back and relax!

Installing Notes/Designer/Admin 12
Once the Windows installation was completed the next step was to install Notes. After downloading the .exe from Flexnet the installation went as smooth as expected. I copied stuff from my data dir on my Notes 11VM – working sets, dbs, etc. with no problem.
DO NOT DO THIS
Before taking the official route outlined above, I tried some of the other methods (for example UUP Dump) where you download a package with shell scripts that go out and download all of the necessary installation files and packages them up into an ISO image. Despite successfully downloading and building the ISO images, the installations crapped out almost immediately.
NEXT STEPS
There is a lot of blogging and building of demos I want to get to so I plan on putting this configuration through its paces. in the near future. Having used the 13″ MacBook Air for the past 4.5 years or so, my first impression of the 16″ screen was that it’s waaay too big. But it is growing on me and feels long overdue. I’m looking forward to having some fun with this machine.
